How Material Compatibility Affects Industrial Piping Systems
Industrial piping systems transport aggressive chemicals, high-temperature fluids, abrasive slurries, and pressurized media, with minimal margin for error. Understanding how materials perform within industrial piping systems is critical to long-term reliability.
Material compatibility in industrial piping systems refers to how well a piping material withstands these conditions over time. When compatibility is overlooked or evaluated in isolation, the consequences can be costly and dangerous for any industrial piping systems design.
Common outcomes of poor material compatibility in industrial piping systems include:
- Accelerated corrosion or chemical degradation
- Leaks at joints or along pipe walls
- Premature system failure and unplanned shutdowns
- Increased maintenance and replacement costs
- Safety hazards and environmental compliance risks
This guide breaks down the key factors that determine material compatibility in industrial piping systems, compares common materials such as HDPE, PVC, steel, stainless steel, FRP, and lined systems, and explains how proper selection improves performance.
5 Key Factors That Determine Material Compatibility in Industrial Piping Systems
Selecting materials for industrial piping systems requires more than matching a pipe to a fluid type. Engineers must evaluate how materials behave under real operating conditions.
1. Chemical Exposure and Corrosion Potential
Chemical compatibility is one of the most important considerations in industrial piping systems. Acids, solvents, and oxidizers all interact differently with piping materials.
Materials like HDPE are widely used in industrial piping systems due to their strong resistance to corrosion and chemical attack.
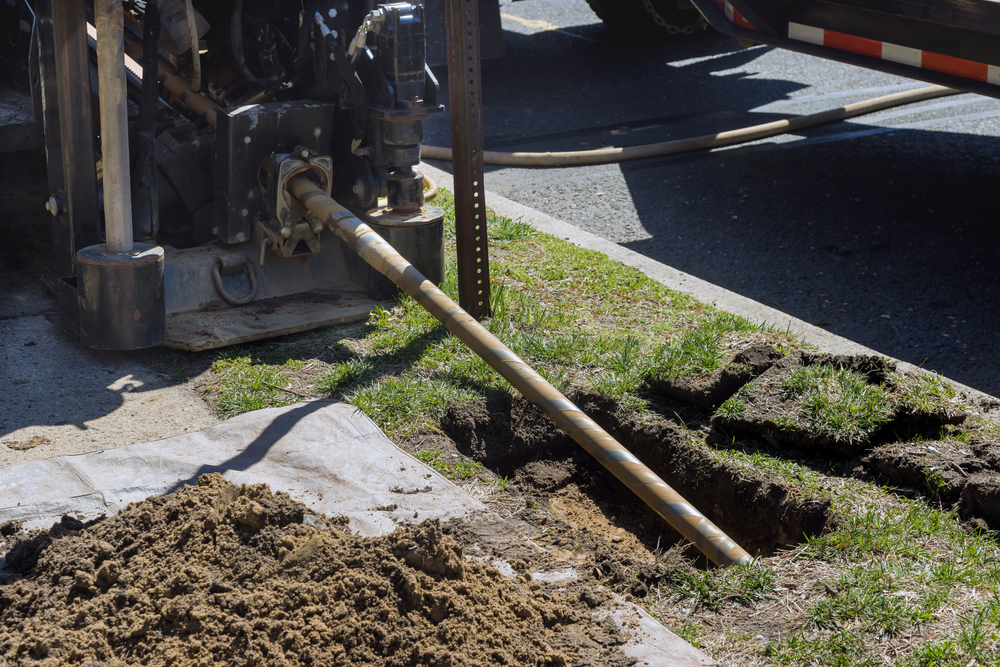
Projects requiring chemical resistance and leak prevention often benefit from on-site plastic fusion, which ensures proper joint integrity in corrosive environments.
2. Temperature and Pressure Requirements
Temperature and pressure must be evaluated together in industrial piping systems, as elevated temperatures reduce pressure ratings.
Failure to properly evaluate these factors is a common cause of failure in industrial piping systems, especially in high-temperature industrial environments.
3. Abrasion and Flow Characteristics
Many industrial piping systems transport abrasive materials, which can wear down pipe walls over time.
HDPE is commonly used in industrial piping systems due to its smooth internal surface and resistance to abrasion, making it ideal for slurry and mining applications.
4. Fluid Composition and pH Levels
Fluid composition plays a major role in industrial piping systems, especially when dealing with variable pH levels or chemical additives.
Even well-designed industrial piping systems can fail if secondary chemicals or process changes are not considered.
5. Environmental and External Conditions
External conditions such as UV exposure, moisture, and installation environment impact industrial piping systems over time.
Proper planning ensures industrial piping systems maintain performance even in harsh environmental conditions.
Comparison of Common Materials Used in Industrial Piping Systems
Choosing materials for industrial piping systems involves balancing chemical resistance, durability, and cost.
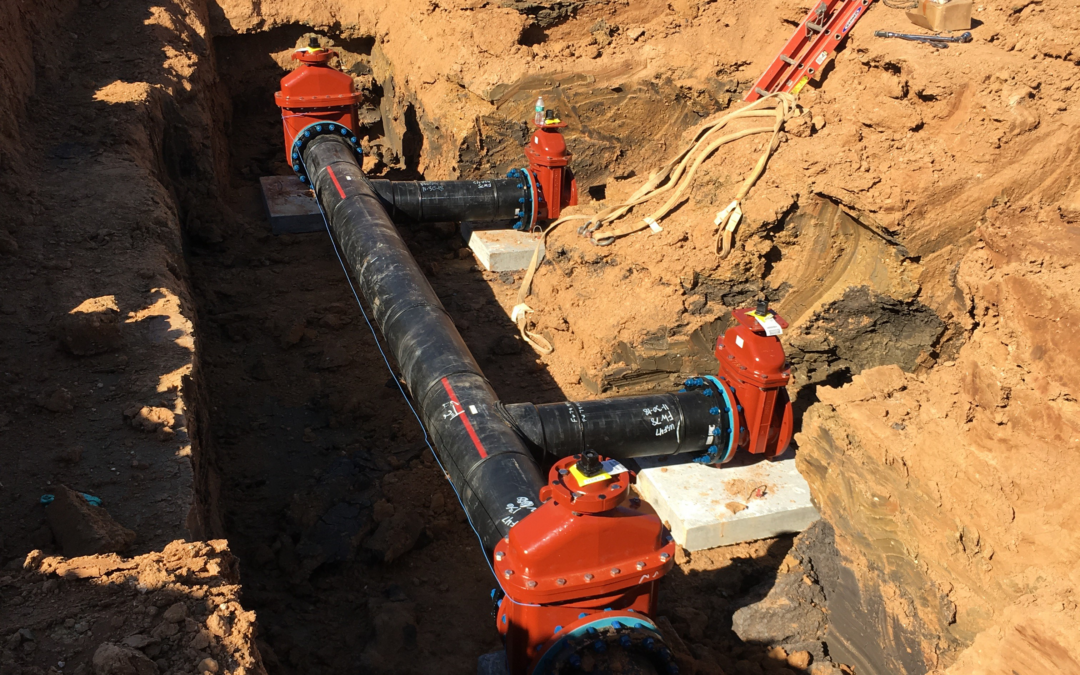
HDPE remains one of the most widely used materials in modern industrial piping systems due to its flexibility and corrosion resistance.
Common Materials Used in Industrial Piping Systems
HDPE (High-Density Polyethylene)
Key Strengths
- Excellent chemical resistance across acids, bases, and industrial fluids
- Performs well in corrosive and abrasive environments
- Smooth internal surface reduces friction, scaling, and wear
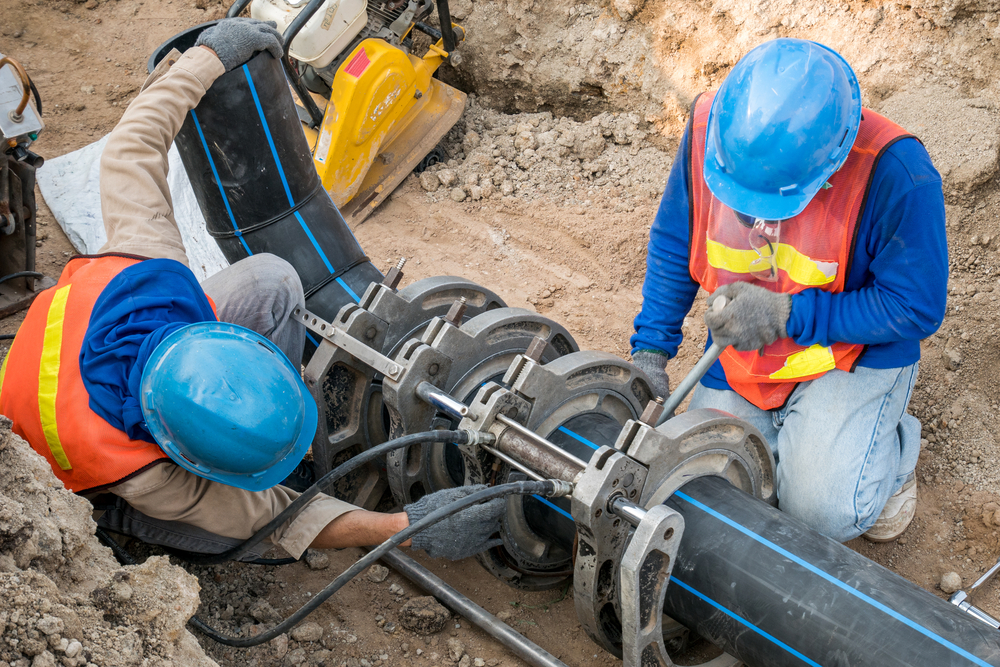
- Fusion-joined systems eliminate leak paths
- Flexible material accommodates ground movement and thermal expansion
Ideal Applications
- Water and wastewater systems
- Chemical processing
- Mining
- Industrial conveyance
- Slurry transport
- Corrosive service lines
Limitations / Considerations
- Pressure and temperature ratings must be carefully evaluated
- Not suitable for sustained high-temperature applications beyond material limits
PVC / CPVC
Key Strengths
- Cost-effective and widely available
- Easy to install and fabricate
- Good resistance to many acids, bases, and salts
Ideal Applications
- Low- to moderate-pressure chemical transfer
- Water treatment
- Non-abrasive industrial fluids
Limitations / Considerations
- Limited temperature tolerance compared to other materials
- Brittle under impact or cold conditions
- Joint integrity concerns in high-stress or dynamic environments
Carbon Steel
Key Strengths
- High pressure and temperature capability
- Excellent mechanical strength
- Commonly specified in oil, gas, steam, and energy systems
Ideal Applications
- High-pressure steam
- Hydrocarbons
- Non-corrosive industrial fluids
Limitations / Considerations
- Highly susceptible to corrosion without coatings or inhibitors
- Maintenance-intensive in aggressive environments
- Increased risk of leaks and wall thinning over time
Stainless Steel
Key Strengths
- Improved corrosion resistance over carbon steel
- Suitable for a wide range of industrial processes
- Available in multiple alloys
Ideal Applications
- Food and beverage processing
- Pharmaceuticals
- Chemical handling
- Clean industrial systems
Limitations / Considerations
- Corrosion resistance varies by alloy and environment
- Risk of pitting, crevice corrosion, and stress corrosion cracking
- Higher upfront material and fabrication costs
FRP (Fiberglass Reinforced Plastic)
Key Strengths
- Good chemical resistance for many corrosive fluids
- Lightweight compared to metal piping
- Lower thermal conductivity than steel
Ideal Applications
- Chemical processing
- Scrubber systems
- Corrosive exhaust
- Waste lines
Limitations / Considerations
- Sensitive to impact damage and UV exposure
- Performance depends on resin selection and fabrication quality
- Repairs can be complex and specialized
Lined Piping Systems
Key Strengths
- Combines steel strength with corrosion-resistant liners
- Suitable for aggressive chemical services
Ideal Applications
- High-pressure chemical transport where metallic strength is required
Limitations / Considerations
- Vulnerable to liner separation, seams, and fitting failures
- Complex inspection and repair processes
- Higher system cost and longer lead times
A Summary: Comparison of Industrial Piping Materials
Industrial piping materials vary in chemical resistance, pressure and temperature capability, abrasion resistance, and maintenance requirements. HDPE offers leak-free fusion joints and corrosion resistance, while steel provides high strength, PVC offers cost efficiency, and FRP and lined systems address specialized chemical applications.
How Material Compatibility Impacts Long-Term Performance and Reliability in Industrial Piping Systems
Material compatibility is a key factor in determining the reliability of industrial piping systems.
Service Life and System Longevity
Compatible materials extend the life of industrial piping systems, while incompatible materials accelerate failure.
Leak Prevention and Joint Integrity
Many failures in industrial piping systems occur at joints. Fusion-joined systems help reduce leak risks and improve system integrity.
Facilities looking to reduce leak risks often rely on field installation and repair of plastic pipe systems to ensure proper system performance.
Maintenance Frequency and Inspection Demands
Proper material selection reduces maintenance needs in industrial piping systems, lowering operational costs and downtime.
Total Cost of Ownership vs. Upfront Material Cost
While upfront costs may vary, well-designed industrial piping systems typically result in lower long-term costs.
Safety, Compliance, and Risk Reduction
Reliable industrial piping systems help reduce environmental risks and ensure regulatory compliance.
Common Causes of Material Failure in Industrial Piping Systems
Even well-designed industrial piping systems can fail if compatibility is not fully understood.
Chemical Attack and Material Degradation
Improper material selection can lead to rapid failure in industrial piping systems, especially in aggressive environments.
Typical failure mechanisms include:
- Corrosion in metallic piping
- Softening, swelling, or embrittlement in thermoplastics
- Cracking caused by chemical permeation or stress corrosion
Thermal Cycling and Pressure Fatigue
Repeated temperature and pressure changes stress industrial piping systems, leading to long-term damage.
Over time, these conditions can cause:
- Fatigue cracking
- Joint loosening or failure
- Creep or deformation in thermoplastics
Abrasion-Induced Wall Thinning
Abrasive flow conditions can degrade industrial piping systems, especially in mining and slurry applications.
Common abrasion-related failures include:
- Progressive wall thinning
- Localized erosion at bends, fittings, and transitions
- Sudden rupture after unnoticed material loss
Improper Material Selection or Specification
Many failures in industrial piping systems result from incomplete evaluation of operating conditions.
Common specification errors include:
- Ignoring chemical concentration or exposure duration
- Overlooking temperature-related pressure derating
- Failing to account for future process changes
Installation and Joining Method Failures
Even compatible materials can fail if industrial piping systems are not installed correctly.
Failure risks include:
- Poor joint preparation or alignment
- Inadequate fusion, welding, or bonding
- Mismatch between material properties and joining techniques
5 Best Practices for Selecting the Right Material for Industrial Piping Applications
Selecting materials for industrial piping systems requires a structured approach.
1. Start With a Detailed Chemical Compatibility Review
A thorough review helps prevent failures in industrial piping systems.
Best practices include:
- Reviewing chemical compatibility charts and manufacturer data
- Accounting for chemical concentration, temperature, and exposure duration
- Identifying additives, cleaning agents, and byproducts that may impact material performance
This step alone can eliminate many of the most common causes of material failure.
2. Evaluate Operating Temperature and Pressure Together
Temperature and pressure must be evaluated together in industrial piping systems.
Key considerations:
- Confirm continuous and peak operating temperatures
- Apply pressure derating for elevated temperatures
- Consider startup, shutdown, and upset conditions
Failing to evaluate worst-case conditions can lead to unexpected deformation or failure.
3. Consider Fusion-Joined vs. Mechanical Joint Systems
Fusion systems improve performance in industrial piping systems by reducing leak paths.
- Fusion-joined systems reduce leak paths and joint maintenance
- Mechanical joints may be more susceptible to loosening, corrosion, or gasket failure
- Material selection should align with the preferred joining method
Joint reliability is particularly crucial in hazardous or corrosive environments.
4. Account for Future Process Changes and Expansion
Future-proofing ensures long-term success of industrial piping systems.
Best practices include:
- Planning for increased flow rates or pressure
- Considering changes in chemical formulation or operating temperature
- Selecting materials with flexibility for future modifications
Designing solely for current conditions can limit system adaptability and increase long-term cost.
5. Engage Material and Application Experts Early
Working with specialists improves the design and performance of industrial piping systems.
Benefits include:
- Application-specific material recommendations
- Improved system design efficiency
- Reduced risk during installation and commissioning
Expert input helps ensure material selection aligns with both operational and business goals.
Why HDPE Is Increasingly Specified for Industrial Piping Systems
HDPE is becoming the preferred material in many industrial piping systems due to its performance advantages.
Proven Performance in Corrosive and Abrasive Environments
HDPE resists corrosion and abrasion, making it ideal for industrial piping systems.
- Unlike metallic piping, HDPE does not corrode, pit, or scale when exposed to harsh chemicals, significantly reducing degradation over time.
- In applications involving slurries or particulate-laden flow, HDPE’s abrasion resistance and smooth internal surface help maintain wall thickness and consistent flow performance.
Leak-Free Fusion Joints Improve System Integrity
Fusion joints improve reliability in industrial piping systems
Key benefits include:
- Elimination of gaskets, bolts, and mechanical seals
- Reduced leak paths throughout the system
- Improved performance under pressure cycling and thermal movement
Reduced Maintenance and Long-Term Reliability
HDPE reduces maintenance needs in industrial piping systems, lowering costs.
This results in:
- Lower maintenance labor costs
- Reduced unplanned downtime
- Improved operational continuity
Adaptability Across Industries
HDPE is used in a wide range of industrial piping systems, from mining to wastewater.
HDPE piping systems are used across a broad range of industries, including:
- Chemical processing
- Mining and mineral processing
- Water and wastewater treatment
- Power and energy infrastructure
- Industrial manufacturing
Sustainability Benefits
HDPE supports modern environmental goals for industrial piping systems.
HDPE supports modern industrial priorities by offering:
- Leak-resistant systems that reduce environmental risk
- Long service life that minimizes material replacement
- Lightweight construction that lowers installation energy and emissions
US FUSION: Supporting Smarter Material Decisions
Modern industrial piping systems require expert planning and material selection.
US FUSION works with engineers and facility teams to design and install high-performance industrial piping systems that deliver long-term reliability.