Types of HDPE Pipe Fusion

Types of HDPE Pipe Fusion

HDPE piping provides durable, long-lasting options for many piping applications. Highly customizable, HDPE piping can be applied using various pipe sizes and fusion techniques. These fusion techniques make HDPE piping unique, allowing long pipe stretches to connect and maneuver through complex spaces. US FUSION provides tailored solutions to meet your needs through HDPE pipe fusion.

What Is Pipe Fusion?

In most piping applications, a single section of HDPE pipe will not get the job done. When multiple pieces of pipe are needed, HDPE pipe fusion comes in. While there are many types of HDPE pipe fusion, each involves heating the pipe and applying pressure to fuse two pieces together. In doing so, HDPE pipe fusion ensures long stretches of pipe are securely fused, resulting in a continuous, sealed connection.

At US FUSION, our on-site plastic fusion team is highly skilled in HDPE pipe fusion methods. Whether your piping is underground or exposed, we focus on safety for both our crew and for the environment. We’ll ensure your pipe connections are strong and sealed properly, keeping unwanted elements out of the environment — all while meeting the highest industry standards and environmental regulations.

4 Types of HDPE Pipe Fusion

Not sure what fusion method is needed for your project? We’ve got you covered. Below we’ll break down HDPE pipe fusion and application methods.

Butt Fusion

Butt fusion is used when two straight pieces of pipe need to be fused together. Butt fusion is the most common and best pipe fusion method. In this method, a fusion machine holds two pieces of pipe while the ends are heated with a heater plate. Once heated, force is used to push the two ends together where they are left to cool. After the cooling process is complete, the two pieces of pipe are firmly connected and sealed. The butt fusion weld will then be stronger than the pipe.

Electrofusion

Electrofusion is used in tight spaces and with fittings where butt fusion cannot be used. Electrofusion couplers are needed to make this fusion connection. In this method, electrofusion couplers have copper coils inside the coupler that are then heated up to fuse to the pipe together to create a tight seal.

Socket Fusion

When flexibility is vital, socket fusion is used. Socket fusion involves heating the outside of a pipe while simultaneously heating the end of a socket. Once each piece is heated to the ideal temperature, the socket is then inserted into the pipe. As the two pieces cool, the connection is sealed, and flexibility remains.

Saddle Fusion

Saddle fusion connects the concave portion of a pipe to an inverse saddle fitting. To get a precise connection, both the concave portion of the pipe and the saddle fitting are heated. Once heated, the two pieces are joined together using force, and the piping is then allowed to cool under pressure. This heat/pressure method creates a tight seal at a complex connection point.

Get Expert HDPE Pipe Fusion For Any Application

Think your application may require some type of HDPE pipe fusion? US FUSION can help! Our skilled builders, contractors, and craftsmen are capable of providing valuable services across a variety of industries — helping you keep your project and environment safe. Contact us today for more information.

Sliplining Pipe: How It Works and Why It’s Beneficial

Sliplining Pipe: How It Works and Why It’s Beneficial

Although it’s one of the oldest methods in the industry, sliplining is still a popular choice for underground pipe rehabilitation projects. Let’s take a closer look into what it is, how it works, and why it’s beneficial for a number of specialty construction applications.

What Is Sliplining?

Sliplining is a trenchless underground pipe rehabilitation technique that involves installing a pipe of a slightly smaller diameter into a larger “host” pipe, then grouting the space between the two and sealing the ends. This process helps to restore the structural integrity of the existing pipeline, and helps to prevent the need for a more costly, time-consuming, and labor-intensive pipe replacement.

6 Steps of the Sliplining Process

The sliplining process can vary depending on a number of factors, from field conditions to pipe materials and host pipe conditions. However, it most commonly follows a six-step process, which we’ll outline below.

1. Inspect the Host Pipe

The first, and arguably most critical step, of the sliplining process is to inspect the condition of the host pipe. During the inspection, you’ll assess the level of pipe deterioration, which is critical in determining how feasible the sliplining procedure may, or may not, be. In some cases, a host pipe inspection is done manually, but the preferred method is to use remote controlled closed circuit television (CCTV) equipment to inspect the pipe. High definition cameras inside the pipe allow you to inspect the existing pipelines safely.

2. Clean Out the Host Pipe

After you’re done with inspection and you’ve determined that sliplining is a feasible solution, you need to thoroughly clean and clear out the host pipe. This prepares the pipe for lining installation and can be accomplished using a variety of tools and methods. Some of the most common pieces of cleaning equipment include plugs, cleaning buckets, water jets, and pipeline pigs.

3. Join the Carrier Pipe(s)

Before you can install a carrier pipe into the host pipe, you’ll have to join various sections together to reach your desired length. These sections are usually welded together using butt fusion technology. Bell and spigot pipe can also be used, and the joints can be pushed together during installation.

4. Access the Host Pipe

As a final step before installation can begin, you need to access the host pipe via two small excavations, commonly known as the entry and exit pits. The areas of these excavations serve as the beginning and end of your liner installation.

5. Install the Carrier Pipe

Once you’ve done everything to prepare both pipes, you’re ready to install! You can install the carrier pipe by either pushing or pulling it through the host pipe until it reaches its intended placement. Then, in some cases, a 24-hour resting period is required following the installation. If necessary, you can use one of several ways to restore lateral pipe connections.

6. Restore the Terminal Connections and Grout the Annular Space

The final step of sliplining is to restore connections at the terminal ends of the carrier pipe and grout the annular space surrounding it. Not only does this help stabilize the new liner, but it also helps ensure that the pipe doesn’t experience any substance leakage that could potentially harm the environment.

Once your newly lined pipe is fully grouted and stabilized, you’ve completed the sliplining process. However, it’s best to keep an eye on how the new parts are performing for a couple of days, just to make sure everything still goes as planned.

4 Key Advantages of Sliplining

The sliplining process dates all the way back to the 1940s, but it’s stuck around for good reason! And with newer systems and technologies available each year, the process has only become more efficient over time.

If you’re in need of an underground pipe rehabilitation, sliplining is one of your best options. Here are a few reasons why:

  • Affordable – When compared to a complete pipe replacement, the cost of a sliplining procedure is considerably less expensive.
  • Efficient – With the help of an experienced technician and innovative technology, sliplining is a fast and simple process — helping you ensure your operations are back up and running with minimal downtime and environmental concern.
  • Less excavation – Sliplining involves much less excavation than a full pipe replacement. This means you’ll have to worry about far less disruption, waste, and cleanup.
  • Long-lasting performance – Sliplining is guaranteed to repair any deteriorating pipes and restore them to full capacity, helping you remove any risks of corrosion or leakage for years to come.

Want to learn more about our sliplining capabilities at US FUSION? Check out our downloadable brochure!

Need to rehabilitate your underground piping system? Choose US FUSION. With decades of experience in pipe rehabilitation, our team has a long history of applying the latest technologies, construction methods, and safety practices within our operations. Complete your project with us and discover why we’re the best choice in the industry. Request your free quote today.

What Is HDPE Piping?

What Is HDPE Piping?

HDPE piping is one of the things we do best here at US FUSION — but if you’re not working with it every day like we are, you may have some questions about what it is and how it works.

Below, we’ll explore the answers to some of those questions, giving you an overview of everything you need to know about HDPE piping: what it is, what it’s used for, and how it can benefit your application.

What Is HDPE Piping?

First things first — HDPE stands for high-density polyethylene, which is a type of thermoplastic made from petroleum. It’s flexible, but that definitely doesn’t mean it lacks in strength or performance. Among other things, HDPE is known for its outstanding water, chemical, and impact resistance — all qualities that come together to make it a top material choice for a number of applications, including heavy-duty piping.

What Is HDPE Piping Used For?

HDPE piping is corrosion and abrasion-resistant, making it a great material for transporting various solids, liquids, and gases safely and effectively. You can find HDPE piping being used for many industrial applications, some of the most common being:

  • Municipal and industrial water and waste
  • Potable water
  • Wastewater and sewer
  • Drainage
  • Firewater
  • Oil and gas gathering systems
  • Methane recovery systems
  • Landfills
  • Water supply lines for oil recovery

The bottom line is, from firewater to hazardous waste, there is no system more effective at safely containing and transporting material than HDPE piping.

What Are the Benefits of HDPE Piping?

In recent years, HDPE piping has grown in popularity in various industries — and for good reason. Many have come to realize the countless benefits it brings, including:

HDPE Piping is Durable

Arguably the greatest benefit of HDPE piping is its exceptional durability. It offers water, temperature, and corrosion resistance — three things that other types of piping (galvanized steel, PVC, copper) just can’t do. Depending on how it’s applied, designed, and installed, HDPE piping can last an astounding 50-100 years.

It’s More Affordable Than Other Options on the Market

Since HDPE piping is made of plastic, it’s much more lightweight than other types of piping. This means that it usually costs less to manufacture, transport, and install. It can also help save money and resources in regards to reduced installation time and labor.

It Delivers High Performance Across Applications

One of the biggest issues you may face with other piping systems is leaks. However, HDPE’s installation and fusion process lends itself to unparalleled leak-free performance. The fusions create a monolithic connection and are even capable of handling the frequent surges common in water distribution and oil transportation.

Easy to Repair and Maintain

On the off chance that your HDPE piping does have performance issues, due to aging or normal wear and tear, repairs are simple. Electrofusion couplers and off carriage butt welds can be performed in tight conditions to repair HDPE pipe. With trenchless techniques and technologies, HDPE pipe can be used to repair failing steel, concrete, and ductile iron pipelines. If it’s time to replace or upsize your existing piping system, whether it’s an HDPE system or not, HDPE piping makes it easier than ever.

HDPE is a Sustainable Piping Option

For multiple reasons, HDPE piping is a fairly sustainable option. It takes less energy to manufacture than non-plastic pipes, requires fewer fittings due to its flexibility, and prevents hazardous toxins from escaping into the environment. It’s also capable of being recycled into non-pressure piping applications.

How Is HDPE Piping Installed?

HDPE pipes can be installed through two techniques: trenching and trenchless. Trenching involves digging deep trenches, then installing the pipe. It’s messier than the trenchless technique, but it works more effectively for certain applications.

Trenchless installation, as the name suggests, doesn’t require digging any trenches before the pipes can be installed. It makes use of many different techniques to get the job done, such as directional drilling, sliplining, and pull-in-place lining.

If you’d like to learn more about how HDPE piping may suit your application, contact US FUSION. We’re one of the only companies in the industry equipped with over 35 years of experience in complete installation, supply, and on-site fusion. All of that experience combines to deliver you some of the most specialized HDPE piping systems on the market.

4 Types of Erosion Control Systems

4 Types of Erosion Control Systems

Erosion control is important in protecting both the environment and your construction project from a number of hazards, and it’s one of the services we do best here at US FUSION. But when our clients come to us needing an erosion control system, they’re often unaware of all the different types available to them. Let’s take a closer look at a couple common types of erosion control systems, so you can make a more informed decision about what’s best for your application.

What Is an Erosion Control System?

An erosion control system is a solution put in place to prevent wind, water, or sediment erosion. In most cases in industrial facilities, it’s used to manage stormwater runoff, scour, mitigate water pollution, provide protection and/or ballast of a liner system, protect underground pipelines, build protection berms, or protect property.

Some erosion control systems are installed to temporarily reduce the risk of erosion while a project, like a newly constructed building, is carried out. However, many other erosion control systems are implemented permanently, in order to protect an area from erosion in the long term.

Either way, these systems are manufactured with durable materials and installed with expert precision so that they are capable of handling whatever conditions they may encounter.

4 Types of Erosion Control Systems

Now that you know what erosion control systems are and what they do, let’s take a look at some of the different types available.

1. Fabric-Formed Concrete

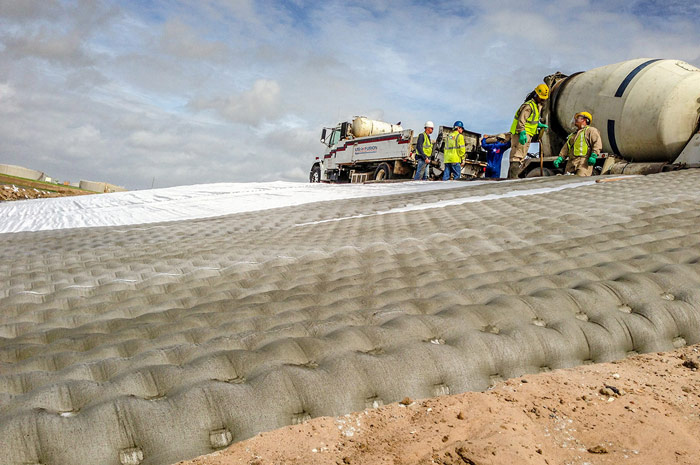
Fabric-formed concrete is made by pumping highly fluid concrete into specially woven fabric “forms”, which look like mattress sections with patterns customized to fit the needs of your application. Fabric-formed concrete allows for fast, cost-effective installation, and its superior woven-fabric technology makes it a quality choice for any construction application. Fabric Form concrete can also include cable-reinforced mattresses to resist some of the more erosive forces.

2. Concrete Canvas®

Concrete Canvas® is a fairly new construction material to the erosion control industry. It’s a flexible, concrete-filled geosynthetic material that hardens upon hydration to form thin layers. It’s also known to be one of the fastest erosion control systems to install — but it’s important that it’s installed and hydrated properly to ensure maximum protection.

3. Grouted Riprap

Grouted riprap is a cement-adhesive mixture that is essentially used to bind rocks together. It’s commonly placed over geotextile to prevent erosion undercutting along ditch, channel, and shoreline banks. In some applications, grouted riprap is accompanied by filters and bedding for a higher level of security.

4. Shotcrete

Using shotcrete for erosion control involves spraying concrete (wet or dry mix) at a high speed to reach a certain compaction or density level. Since shotcrete is strategically sprayed by a professional, it requires less initial framework than other types of erosion control systems. This also means it’s a bit more economical than other systems.

Common Erosion Control System Applications

Erosion control systems are ideal for applications where managing sediment is critical to ensuring safe and stable environmental conditions. Some of the most common of these applications include:

  • Bridge piers
  • Stream banks
  • Drainage ditches
  • Shorelines & seawalls
  • Embankments
  • Dams & spillways
  • Retaining ponds
  • Landfill caps
  • Ports & harbors
  • Lakes & reservoirs

If you’re looking for a reliable, stable, and long-lasting erosion control system, talk to US FUSION. We offer a variety of effective products, including our unique Protex™ solution. With over 35 years of experience in the industry, you can trust us to find the right product for your application. Call us or contact us online to get started.

5 Common Geosynthetic Clay Liner Applications

5 Common Geosynthetic Clay Liner Applications

If your facility is at risk for experiencing a spill or leak, you need a comprehensive and durable containment solution to mitigate hazardous environmental exposure. And if your facility has already experienced a spill or leak, you need a solution fast.

When it comes to containment and waste management, US FUSION is your expert in rapid response and problem solving. We make sufficient repairs, we prevent future disasters, and we commonly do it using geosynthetic clay liners.

Below, we’ll walk through what geosynthetic clay liners are, as well as a few common applications for geosynthetic clay liners.

What Are Geosynthetic Clay Liners?

Geosynthetic clay liner systems are hydraulic barriers manufactured with a variety of low-impermeability materials and supporting geotextiles and geomembranes. All of these materials are adhered with chemical adhesives and mechanical processes like extrusion.

Geosynthetic clay liners are primarily used for waste management and containment. There are a number of environmental laws set by regulating agencies that require any potentially harmful seepage to be contained and disposed of properly — otherwise, these hazardous materials could cause major environmental and health issues. Although there are many containment methods available, geosynthetic clay liners provide great benefits in terms of fast installation, durability, and cost-effectiveness.

5 Geosynthetic Clay Liner Applications

Geosynthetic clay liner systems can benefit a number of containment applications. In this article, we’ll walk through just five of the most common:

1. Geosynthetic Clay Liners for Landfills

Landfills are specifically built to contain and manage waste in a responsible, effective manner. When they’re managed improperly, they can be one of the biggest contributing factors to environmental damage.

Landfills need a containment solution to prevent solid and liquid garbage waste from seeping into the soil and contaminating the surrounding groundwater and environment. That solution often involves geosynthetic clay liners, which are proven to ensure protected, safe conditions for years to come.

2. API Tanks & Foundation Liners

API stands for the American Petroleum Institute, which is an industry authority on all things oil. They’ve established standards for the design and fabrication of steel storage tanks that store oil, gasoline, and chemicals. One such API standard is the requirement that API tanks be lined with a low-permeability solution at the bottom to prevent damage from leaks or spills. There are also some API tank applications that require another layer of lining on the foundation where the tank is set, providing maximum environmental protection.

3. Geosynthetic Clay Liners for Ponds

Geosynthetic clay liners aren’t just great for managing harmful materials — they’re also great for containing something as pure as water in a designated area. One instance where this is helpful is lining a pond.

While some ponds have natural clay bottoms that provide enough of a barrier, some require an artificial or custom-fabricated solution. Installing a geosynthetic clay liner, then adding the proper soil cover, is a great option for keeping necessary water in the pond, while also blocking sediment and other debris from entering it — preserving its natural, ecological beauty and all that resides within it.

4. Earthen Spill Containment Berms

Earthen spill containment berms are containment areas with earthen walls that can vary in size They’re built to prevent hazardous materials from spilling and contaminating the environment, and they’re most commonly placed underneath high-risk devices like oil drums and tanks.

Geosynthetic clay liners can provide spill containment berms with an extra layer of protection. When placed on the surface of the berm, they’re covered with the proper soil cover, and then they can contain any spills and prevent rough terrain like rocks or sticks from poking through and causing contamination.

5. Secondary Containment Dikes, Berms & Levees

Secondary containment is an essential safeguard in stopping the release of spills. In the event that your primary containment system fails, having a backup can save you and the environment from a lot of costly damage. The versatility and durability of geosynthetic clay liner systems make them the ultimate backup for complete compliance and safety.

If you need a comprehensive containment solution for your application, you can trust US FUSION to deliver excellence. With decades of experience using a wide range of geosynthetic and secondary containment products, our rapid response, quality workmanship, and dedication to environmental responsibility show in all steps of our process. Give us a call or contact us online so we can help find the most effective option for your application.